In our factory, we see great designs fail simply because the initial spec sheet was unclear, leading to months of avoidable revisions and frustration.
To successfully customize a shockwave shockwave generator 1 machine, send a detailed RFQ including 2D/3D CAD files, specific Pantone color codes, material preferences like medical-grade ABS, and vector logos. Clearly define surface finishes, interface requirements, and quality tolerances to ensure the final product matches your brand vision.
Here is exactly how you should structure your request to get the result you want without delays.
What specific parts of the shockwave therapy machine housing can I customize for my brand?
Our engineering team often wishes clients knew that customization extends far beyond simple logo placement on the front panel or changing a sticker.
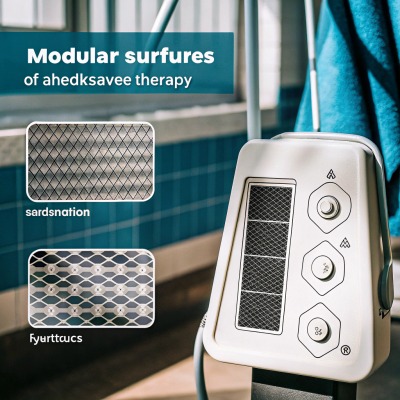
You can customize the main enclosure color, the handpiece grip material for ergonomics, the bezel design, and the touchscreen interface Shore Durometer 2. Advanced options include altering ventilation patterns for thermal management or modifying the trolley structure to create a unique silhouette for your clinic.
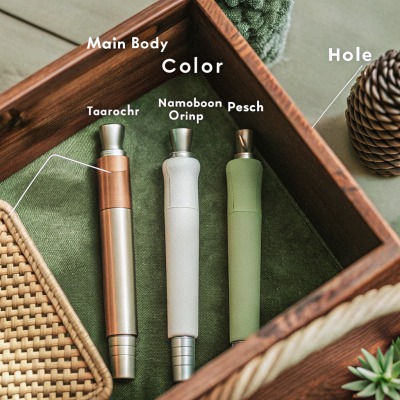
When we develop a new shockwave therapy device shockwave therapy 3, we look at the machine as a collection of modular surfaces. Most buyers assume they can only slap a logo on the front. However, to truly differentiate your product in the US market US market 4, you need to look closer at the details.
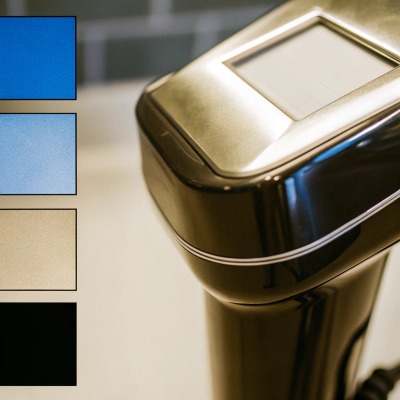
For the main body, which is often a clean, box-like shape, you can change the base color. For example, if your brand identity is "clinical purity," you might choose a matte white finish. If you want a tech-focused look, a metallic silver or deep blue might work better. We can achieve this through spray painting or injecting spray painting 5 the plastic with custom pigments.
The Handpiece and Interface
The handheld applicator is critical because it is the part the therapist touches all day. You can customize the color of the applicator head—perhaps matching the silver and blue theme of your main unit. More importantly, you can specify the material of the grip. We can use silicone overlays for better comfort.
Don't forget the user interface (UI). user interface 6 The screen displaying the human skeletal system is not just a static image. You can ask us to redesign the icons, the boot-up animation, and the color scheme of the menus to match your brand. Even the physical buttons, like the circular blue illuminated button, can be customized. We can change the LED color to green or white to suit your preference.
Customization Methods
We use different techniques depending on your budget and design needs.
- Silk Screen Printing: Good for logos and simple text. It is cost-effective but flat.
- Crystal Stickers: These add a 3D effect to your logo and look premium.
- Laser Etching: Best for metal parts like the applicator handle. It is permanent and will not fade with heavy use.
Parts Customization Checklist
| Component | Customization Options | Technical Limit |
|---|---|---|
| Main Enclosure | Custom Pantone color, matte/gloss finish | Requires minimum order for custom plastic injection |
| Handpiece | Grip color, laser-etched logo, silicone hardness | Must maintain ergonomic weight balance |
| Screen UI | Boot logo, skeletal diagram colors, language | Software compatibility with control board |
| Physical Buttons | LED light color (Blue/Green/White), cap shape | Must fit existing PCB layout |
| Ventilation | Custom cutout patterns | Must meet thermal cooling requirements |
Do I need to supply 3D engineering drawings or just a concept for the appearance design?
We once received a vague concept description that delayed a project by weeks because our designers had to guess the dimensions you actually wanted.
While a concept or mood board works for initial discussions, you must eventually approve detailed 3D engineering drawings (STP files) before tooling begins. Providing specific CAD files accelerates the process, but expert factories can also translate your rough concepts into technical specifications.
You do not always need to start with full engineering drawings, but it helps. If you have an internal design team, sending us STEP (STP) or IGES files is the gold standard. These files tell our mold-making machines exactly where every curve and screw hole should go.
However, many of our successful partners start with a strong "Design Brief." This includes:
- Mood Boards: Photos of other devices you like.
- Rough Sketches: Showing where you want the screen and the handle.
- Written Specs: Dimensions (e.g., "Must fit on a standard medical cart").
From Concept to Production
If you only have a concept, our R&D team will take your idea and create the 3D drawing for you. We will then send this back to you for approval. You must check this carefully. Once you say "yes" to the drawing, we cut the steel for the molds. You cannot change the shape of the plastic after that without spending thousands of dollars on new molds.
Why "Close Enough" is Dangerous
In medical devices, internal mounting points matter. medical devices 7 The shockwave generator inside creates vibration. If your concept drawing looks nice but doesn't account for the internal shock absorbers or the cooling fan placement, the machine will fail. That is why we always convert your concept into a verified engineering drawing.
File Type Guide for OEM
| File Type | Purpose | Who Provides It? |
|---|---|---|
| JPG / PDF | Concept, mood, and logo placement | You (The Buyer) |
| AI / EPS | Vector logos for printing (High Resolution) | You (The Buyer) |
| STEP / STP | 3D shape for mold making and assembly | You or Our Factory |
| DWG / DXF | 2D dimensions and tolerances | Our Factory (for your approval) |
How do I verify the color and finish quality before the full production run starts?
Seeing a finished batch with the wrong texture is a nightmare we help our partners avoid through strict pre-production mass production 8 protocols and physical samples.
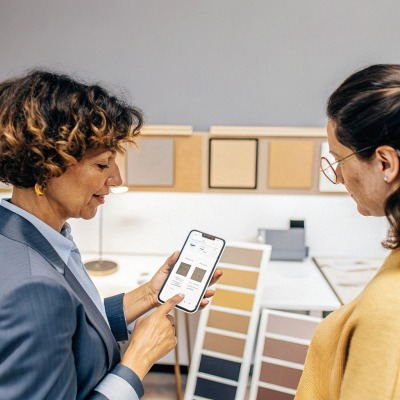
Verify finishes by requesting a “Golden Sample” for physical approval and using standardized Pantone or RAL color charts. Demand material swatches for texture checks, such as the roughness of the handpiece grip, and establish a signed Quality Agreement defining acceptable cosmetic tolerances.
Trusting a photo via email is risky. Lighting conditions in our factory in Guangzhou are different from your office in the US. A "medical blue" might look navy on my screen and teal on yours. To ensure the appearance is perfect, you need a physical verification process. physical verification process 9
The Golden Sample
Before we start mass production, we produce one unit—the "Golden Sample." We mail this to you. You must hold it, touch it, and use it.
- Check the Color: Compare the casing against your physical Pantone chip.
- Check the Finish: Is the silver on the applicator brushed or polished? Does it show fingerprints?
- Check the Button: Does the circular blue light look uniform, or is it patchy?
Material Texture and Feel
For a shockwave machine, the tactile feel is part of the user experience. tactile feel 10 You should specify the "Shore Durometer" for any rubber or silicone parts. This measures hardness. A grip that is too soft might peel; one that is too hard feels cheap.
We also recommend defining a "limit sample" for cosmetic defects. For example, you might agree that a tiny scratch less than 0.5mm on the bottom of the unit is acceptable, but zero scratches are allowed on the screen bezel. Writing this down prevents arguments later.
Quality Control Checkpoints
- Raw Material Check: verifying the plastic pellets or paint codes.
- First Article Inspection: The first unit off the line is checked against your Golden Sample.
- Cosmetic Inspection: Looking for flow marks, sink marks, or color streaks on the blue and white housing.
Will customizing the machine's outer shell significantly increase my lead time or costs?
Our finance department frequently warns clients that full enclosure redesigns can impact cash flow if not planned correctly from the start.
Customizing the outer shell usually increases lead times by 4 to 8 weeks for new mold creation and raises initial costs due to tooling fees. However, minor changes like color painting, laser etching, or screen printing have minimal impact on schedule and budget.
The answer depends on how deep you want to customize. There are generally three levels of customization, and each impacts your time and money differently.
Level 1: Surface Customization (Fast & Cheap)
If you keep our standard machine housing (the blue/white box shape) but change the paint color, add your logo via silk screen, and customize the startup screen, the cost is low.
- Cost: Minimal setup fees ($100-$500).
- Time: Adds only 1 week to production.
- MOQ: Low (often 10-20 units).
Level 2: Minor Structural Changes (Moderate)
This might involve changing the bezel ring or adding a custom bracket for the handpiece. We need to make small "soft molds" or modify existing aluminum parts.
- Cost: Moderate ($1,000 – $5,000).
- Time: Adds 3-4 weeks.
Level 3: Full Enclosure Redesign (Expensive & Slow)
If you want a completely new shape—perhaps a curvy, futuristic design that looks nothing like our standard model—we must open new steel injection molds.
- Cost: High ($10,000 – $30,000+ for large molds).
- Time: Adds 8-12 weeks (Design + Prototyping + Mold making + Testing).
- MOQ: High (Usually 100+ units) to amortize the mold cost.
Return on Investment (ROI)
For a start-up brand, I usually recommend Level 1 or 2. The ROI on a fully custom mold is only justified if you plan to sell hundreds of units per year. A smart compromise is to use our "modular" designs. We have chassis options where you can swap out just the front panel. This gives you a unique face for the machine without paying for a whole new body mold.
Cost vs. Time Breakdown
| Customization Level | Est. Setup Cost | Time Added to Order | Recommended For |
|---|---|---|---|
| Logo & Paint Only | < $500 | + 1 Week | New brands, testing market |
| Custom Attachments | $2,000 – $5,000 | + 4 Weeks | Established distributors |
| New Housing Mold | $15,000+ | + 10 Weeks | Large national brands |
Conclusion
Clear specs prevent costly errors. Partner with us early to blend your aesthetic vision with our engineering reality for a successful launch.
Footnotes
1. Scientific overview of shockwave generation mechanics in medical devices. ↩︎
2. Official standard test method for measuring rubber and plastic hardness. ↩︎
3. World Health Organization resources on the classification and use of medical devices. ↩︎
4. News coverage of the healthcare and medical technology market in the United States. ↩︎
5. Technical background on the industrial spray painting process for plastic enclosures. ↩︎
6. Academic research on human-computer interaction and user interface design principles. ↩︎
7. Official FDA regulations and safety standards for medical devices in the United States. ↩︎
8. General overview of the history and methods of industrial mass production. ↩︎
9. NIST guidelines on measurement science and physical verification in manufacturing. ↩︎
10. ISO standards for the ergonomics of human-system interaction and tactile feedback. ↩︎

 English
  Español de México
  Deutsch
  Français
  العربية
  Русский