When we first started producing pressotherapy machines 2 at our facility in Guangzhou, one of the biggest concerns from our B2B clients was pressure accuracy. They would ask: How do I know the pressure my customers feel matches what the screen says certified reference standards 3? This question is crucial because imprecise pressure can mean the difference between effective lymphatic drainage 4 and a treatment that does nothing—or worse, causes discomfort.
To verify medical-grade pressure accuracy for pressotherapy machines, you need to calibrate against certified reference standards, use validated interface pressure sensors, and conduct multi-point testing across the full 20-220 mmHg range. Regular verification using traceable calibration equipment ensures readings stay within the ±10% tolerance required for medical-grade devices.
In this guide, we will walk through the exact methods you can use to independently verify pressure accuracy, the testing protocols your OEM supplier should follow, how to maintain sensor accuracy after shipping, and how to request custom calibration settings for your private-label line NIST-traceable calibration 5. Let’s dive in.
How can I independently verify that the pressure levels match the technical specifications?
Our engineering team often hears this question from purchasing managers who receive their first shipment Installation Qualification (IQ) 6. They trust our factory calibration, but they want to double-check. This is smart. Independent verification protects your brand and your customers.
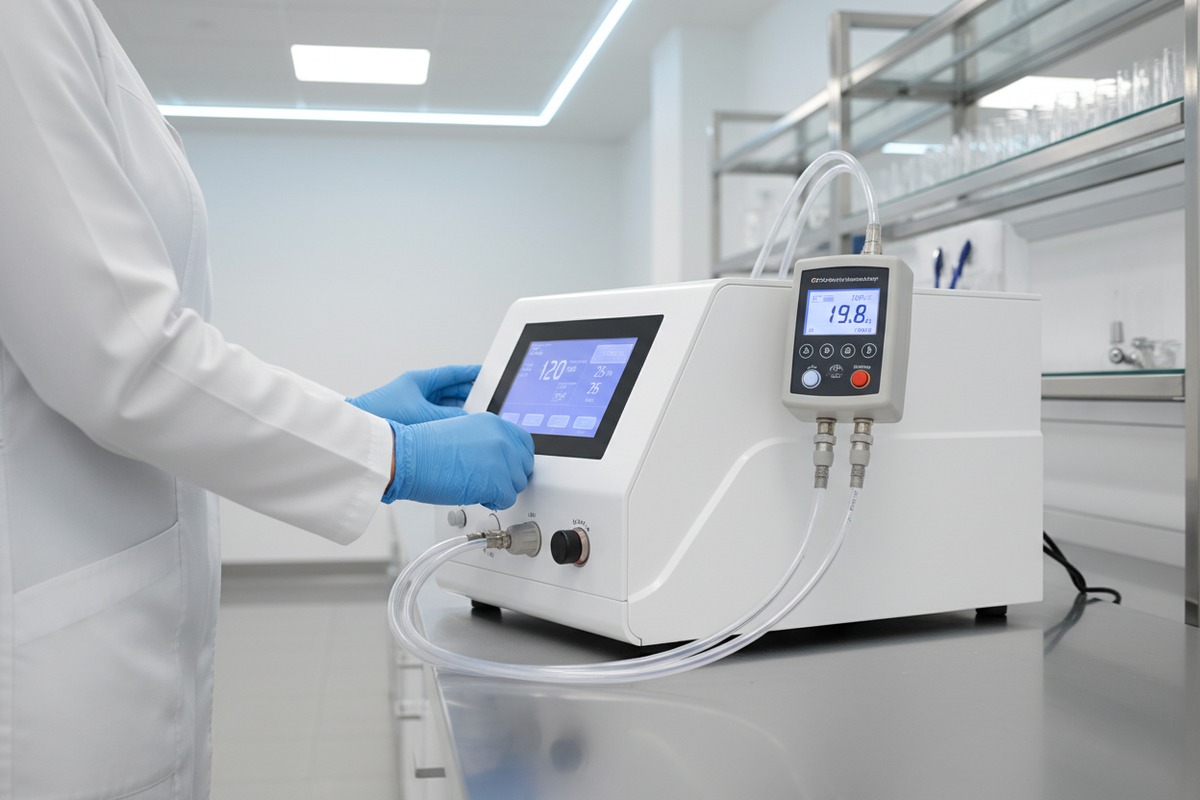
You can independently verify pressure accuracy by using a calibrated digital manometer or pressure gauge connected to the air chambers. Compare displayed values against measured values at multiple pressure points (low, mid, high) and check that deviations stay within ±10% for standard devices or ±5% for closed-loop systems.

Understanding Your Verification Tools
The first step is getting the right equipment. You need a pressure reference device that is more accurate than the device you are testing. A digital manometer 7 with 0.1 mmHg resolution and NIST-traceable calibration works well.
Connect the manometer to a cuff chamber using a T-connector or the machine's test port if available. Set the machine to deliver a specific pressure, such as 60 mmHg. Wait for the chamber to stabilize. Then read both the machine display and the manometer.
Multi-Point Verification Protocol
Do not test just one pressure level. Test at least three points across the operating range.
| Test Point | Target Pressure | Acceptable Range (±10%) | Acceptable Range (±5%) |
|---|---|---|---|
| Low | 30 mmHg | 27-33 mmHg | 28.5-31.5 mmHg |
| Mid | 100 mmHg | 90-110 mmHg | 95-105 mmHg |
| High | 180 mmHg | 162-198 mmHg | 171-189 mmHg |
If your machine has gradient settings, test the pressure drop between chambers as well. Some devices allow you to set the gradient (pressure drop in the next pumped chamber) by a percentage or in mmHg. Check that the actual gradient matches the programmed value.
Checking Chamber-by-Chamber Accuracy
Professional pressotherapy machines have multiple air chambers—often 4 to 12 or more. Each chamber should deliver consistent pressure. Quality devices allow very fine adjustment of parameters, up to 1 mmHg for pressure setting.
Test each chamber individually. If Chamber 3 consistently reads 15% higher than the display while other chambers are accurate, you have a localized issue—likely a valve or sensor problem in that specific channel.
When to Call for Service
If you find deviations greater than ±10%, document everything. Note the chamber number, the set pressure, the measured pressure, and the date. Contact your supplier with this data. If a piece of measuring equipment is found to be out of calibration at any point, the organization must perform a risk analysis for the equipment.
What specific testing protocols should my OEM supplier follow to ensure medical-grade precision?
When we onboard new clients for OEM partnerships, they often ask what happens inside our factory before the machine ships. This matters because factory testing sets the baseline. If the testing is sloppy, your verification will fail, and your customers will notice.
Your OEM supplier should follow ISO 13485-compliant testing protocols that include 100% pressure cycling of all sensors, multi-temperature compensation tests, calibration against NIST-traceable standards, documented as-found and as-left readings, and full traceability records for every unit shipped.

The ISO 13485 Foundation
Manufacturing medical devices is a highly complex process, and calibration requirements according to ISO 13485, Clause 7.6 (Control of monitoring and measuring equipment), mean high precision and close monitoring. This international standard forms the backbone of medical device quality management.
Your supplier should provide evidence of ISO 13485 certification. But certification alone is not enough. Ask for their specific calibration procedure documents.
Key Testing Phases Your Supplier Must Perform
| Testing Phase | What It Covers | Why It Matters |
|---|---|---|
| Incoming Inspection | Sensor components before assembly | Catches defective parts early |
| In-Process Testing | Pressure output during assembly | Ensures each assembly step meets spec |
| Final Calibration | Complete device vs. reference standard | Sets the shipped accuracy baseline |
| Environmental Testing | Performance at varying temperatures | Factors such as electrical and mechanical shocks or environmental conditions like temperature and humidity may affect the accuracy of measurement. |
| Aging/Burn-In | Running device under load for hours | Reveals early failures before shipping |
Documentation You Should Request
Medical device manufacturers are responsible for performing equipment calibration using traceable standards under controlled conditions and maintaining thorough documentation of all calibration activities.
Request the following for each unit:
- Calibration certificate with as-found and as-left readings
- Serial number traceability
- Reference standard certificate showing NIST or equivalent traceability
- Date of calibration and technician identification
- Specification limits and actual measured values
Understanding Closed-Loop vs. Open-Loop Systems
Better pressotherapy machines use closed-loop feedback systems 8. These systems have internal sensors that continuously monitor actual pressure and adjust output in real-time. They achieve ±5% accuracy instead of the ±10% typical of open-loop designs.
Ask your supplier which type of control system your machine uses. If they cannot answer this question clearly, consider it a warning sign.
Third-Party Validation Options
Some OEM buyers request third-party testing. If calibration services are outsourced, organizations must ensure that the external providers meet the necessary requirements for calibration competence and traceability. Independent labs can provide an unbiased assessment of your supplier's quality.
How do I ensure the pressure sensors remain accurate after long-distance shipping to my facility?
This is a concern we hear frequently from clients in the US and Europe. A machine leaves our factory in Guangzhou in perfect condition. Three weeks later, it arrives after crossing the Pacific, going through customs, and riding in a delivery truck. Can you still trust the readings?
To ensure pressure sensor accuracy after shipping, perform a post-arrival verification using a calibrated reference gauge, inspect for physical damage or loose connections, run a functional test cycle before deployment, and document baseline readings. If deviations exceed ±10%, request recalibration or service.

The Shipping Risk Factors
Accuracy of all instruments decays with usage and wear and tear. Shipping adds risk through vibration, shock, temperature extremes, and humidity changes. Even well-packaged equipment can experience sensor drift.
Our factory uses shock-absorbing foam, humidity indicators, and shock sensors on high-value shipments. But we still recommend post-arrival verification.
Post-Arrival Verification Checklist
Before you plug in the machine, inspect the packaging. Look for signs of rough handling. Check any shock indicators or tilt sensors included with the shipment.
| Inspection Point | What to Look For | Action if Problem Found |
|---|---|---|
| External packaging | Crushing, water damage, punctures | Document and photograph; contact supplier |
| Shock indicators | Color change indicating impact | Document; perform extended testing |
| Internal packaging | Foam displacement, loose items | Inspect components more closely |
| Control unit | Visible damage, loose buttons | Do not power on; contact supplier |
| Cuffs and tubing | Kinks, tears, disconnected fittings | Replace affected components |
Functional Testing Protocol
After visual inspection, perform a functional test:
- Power on the machine and check display initialization
- Run a self-test cycle if the machine has one
- Inflate each cuff to mid-range pressure (around 80 mmHg)
- Listen for air leaks
- Verify all chambers inflate and deflate in the correct sequence
Then perform the multi-point verification described earlier. Compare results to the factory calibration certificate that shipped with the unit.
Establishing Your Baseline
Document everything. Create a receiving inspection record that includes:
- Date received
- Condition of packaging
- Visual inspection results
- Functional test results
- Pressure verification readings (all chambers, three pressure points)
Store this record. If you ever need warranty service or want to track drift over time, this baseline is essential.
Environmental Acclimation
If the machine arrives in cold weather, let it acclimate to room temperature before testing. Environmental conditions (humidity/temperature etc) affect sensor readings. Allow at least 2-4 hours for the unit to reach ambient temperature.
Can I request custom pressure calibration settings for my private-label pressotherapy line?
Private-label customers often ask us about customization options. They want their brand to stand out. Beyond logo placement and color choices, pressure calibration settings are an area where customization can add real clinical value.
Yes, you can request custom pressure calibration settings for your private-label line. Work with your OEM supplier to define specific pressure ranges, gradient profiles, preset programs, and tolerance levels tailored to your target market. Document requirements clearly and validate settings through testing before mass production.

Types of Pressure Customization Available
Customization goes beyond simple branding. Here are the pressure-related parameters you can typically customize:
| Parameter | Standard Range | Customization Options |
|---|---|---|
| Maximum pressure | 180-220 mmHg | Lower max for home use (e.g., 120 mmHg) |
| Minimum pressure | 20-30 mmHg | Adjust for sensitive applications |
| Pressure increment | 5-10 mmHg steps | Finer control with 1 mmHg steps |
| Gradient profiles | Fixed percentage drop | Custom mmHg drop per chamber |
| Preset programs | Generic lymphatic/recovery | Sport-specific, post-surgery, aesthetic |
| Display accuracy | Nearest 5 mmHg | Nearest 1 mmHg for medical positioning |
Defining Your Requirements
Before approaching your OEM supplier, clarify your needs:
- Target application: Is this for clinical lymphedema treatment, athletic recovery, or aesthetic spa use? Each has different pressure requirements.
- User expertise level: Professional therapists can handle complex settings. Home users need simplicity with safety limits.
- Regulatory positioning: If you market as a medical device, you need tighter tolerances and documentation. Wellness devices have more flexibility.
Some devices generate pressure in the range of 20-220 mmHg but your target market may not need the full range.
Working with Your OEM Partner
When you submit customization requests, be specific. Provide written specifications including:
- Exact pressure ranges (min/max for each chamber if different)
- Acceptable tolerance (±5%, ±10%, or custom)
- Gradient behavior (percentage or fixed mmHg drop)
- Preset program parameters (pressure, timing, sequence)
- Display resolution requirements
Our engineering team reviews these requirements, confirms feasibility, and provides a timeline and cost estimate. Complex customizations may require firmware development and extended validation testing.
Validation of Custom Settings
Custom settings need validation before production. Conduct three-phase validation: 1) Certificates audit (ISO 13485, FDA QSR), 2) Production assessment (cleanroom audits, calibration records), 3) Performance testing (hysteresis checks, 10,000+ cycle endurance trials, thermal compensation verification).
Request pilot units with your custom settings. Test them thoroughly. Document the results. Only approve mass production after you confirm the customization meets your requirements.
Cost and Timeline Considerations
Standard customizations like logo placement and preset programs have minimal impact on cost and timeline. Deep customizations like modified pressure ranges or new gradient algorithms require engineering time.
Expect to discuss:
- Non-recurring engineering (NRE) fees for firmware development
- Extended lead time for validation testing
- Minimum order quantities to justify customization investment
- Documentation packages for regulatory submissions
Conclusion
Verifying medical-grade pressure accuracy for pressotherapy machines requires a systematic approach. Use calibrated reference equipment for independent verification. Demand ISO 13485-compliant testing protocols 9 from your OEM supplier. Perform post-arrival verification after shipping. And work closely with your manufacturing partner to customize pressure settings for your private-label line. These steps protect your brand reputation and ensure your customers receive effective, safe treatments.
## Footnotes

<span id="footnote-1">
1. Explains the importance of accurate blood pressure measurement and device validation. <a href="#ref-1" class="footnote-backref">↩︎</a>
</span>

<span id="footnote-2">
2. Explains what pressotherapy is, how it works, and its benefits. <a href="#ref-2" class="footnote-backref">↩︎</a>
</span>

<span id="footnote-3">
3. Defines certified reference materials and their use in calibration and quality control. <a href="#ref-3" class="footnote-backref">↩︎</a>
</span>

<span id="footnote-4">
4. Explains what lymphatic drainage massage is and its benefits for fluid reduction. <a href="#ref-4" class="footnote-backref">↩︎</a>
</span>

<span id="footnote-5">
5. Explains what NIST traceable calibration means and its importance for accuracy and reliability. <a href="#ref-5" class="footnote-backref">↩︎</a>
</span>

<span id="footnote-6">
6. Replaced with an authoritative article explaining Installation Qualification (IQ) for medical devices, which covers post-arrival verification of equipment after delivery and installation. <a href="#ref-6" class="footnote-backref">↩︎</a>
</span>

<span id="footnote-7">
7. Replaced with a comprehensive article explaining what a digital manometer is, how it works, and its various applications. <a href="#ref-7" class="footnote-backref">↩︎</a>
</span>

<span id="footnote-8">
8. Provides FDA guidance on technical considerations for medical devices with closed-loop control technology. <a href="#ref-8" class="footnote-backref">↩︎</a>
</span>

<span id="footnote-9">
9. Explains the ISO 13485 standard for quality management systems in medical device manufacturing. <a href="#ref-9" class="footnote-backref">↩︎</a>
</span>

 English
 Español de México
 Deutsch
 Français
 العربية
 Русский