Over the years at our Guangzhou factory, I have seen countless packaging mishaps derail product launches 2D vector templates 1. A misaligned logo here, a wrong shade of purple there, and suddenly your pressotherapy machine arrives looking like someone else’s brand. This confusion frustrates both our team and the buyers we work with CMYK or Pantone color codes 2. The stakes are high—your packaging is your first impression.
To communicate color box dieline designs effectively, you must provide suppliers with precise 2D vector templates that include cut lines, fold lines, bleed areas, CMYK or Pantone color codes, and accurate product dimensions. Attach 3D mockups and request pre-production samples to verify the final outcome before mass production.
This guide breaks down each step so you can confidently deliver your dieline files and get packaging that matches your brand vision structural packaging design 3. Let us walk through the critical areas together.
How do I ensure my pressotherapy machine dieline measurements are 100% accurate for my supplier?
When our team prepares packaging for a pressotherapy system weighing 16kg with dimensions around 85x50x20cm, even a 2mm error causes headaches Edge Crush Test (ECT) ratings 4. The box does not close properly. The foam inserts shift. The compressor unit moves during transit. These problems lead to damaged goods and unhappy clients.
To ensure 100% accurate dieline measurements, physically measure your pressotherapy machine including all accessories. Add 5-10mm clearance for foam inserts. Use vector design software like Adobe Illustrator or ArtiosCAD. Send both the dieline file and actual product dimensions to your supplier for cross-verification.

Start With Physical Measurements
Never trust catalog specs alone. Our engineers always measure the actual unit before creating packaging. A pressotherapy system includes several components: the control unit, the compression suit, air hoses, and sometimes accessories like leg sleeves or arm cuffs.
Measure each item separately. Record length, width, height, and weight. For irregular shapes, measure the largest dimensions. Document everything in a spreadsheet before moving to design.
Account for Inner Cushioning
For shipping safety, keep your items at least five centimeters from the box's perimeter. Cushioning material should be inserted here, and everywhere else there are gaps. This buffer zone protects against impact during handling.
For pressotherapy machines, we typically use closed-cell polyethylene foam 5. Inserts can be layered or contoured to cradle the product securely, making them perfect for international or high-impact shipping. Choose closed-cell polyethylene foam if you are looking for moisture resistance and extra structural strength.
Use Professional Dieline Software
ArtiosCAD 6 is an industry-standard tool for structural packaging design, seamlessly integrating with manufacturing and die-cutting processes. It enables designers to create precise and complex packaging structures, taking into account factors like material type, weight, and thickness.
Adobe Illustrator 7 is another popular option. The key is using vector-based files. Computers require mathematically described lines; Therefore, dielines must be created as vector art.
Measurement Verification Table
| Component | Typical Dimension | Add Clearance | Final Box Interior |
|---|---|---|---|
| Control Unit | 33.7 x 28 x 6.7 cm | +10mm each side | 35.7 x 30 x 8.7 cm |
| Compression Suit | 85 x 50 x 20 cm | +15mm each side | 88 x 53 x 23 cm |
| Accessories Pouch | 30 x 20 x 10 cm | +5mm each side | 31 x 21 x 11 cm |
What technical specifications should I include in my dieline file to avoid branding errors?
Our team once shipped 500 units with a logo that printed slightly orange instead of the customer's signature red. The root cause? The artwork file used RGB color mode instead of CMYK. That mistake cost time and money to fix. Branding errors like this are entirely preventable.
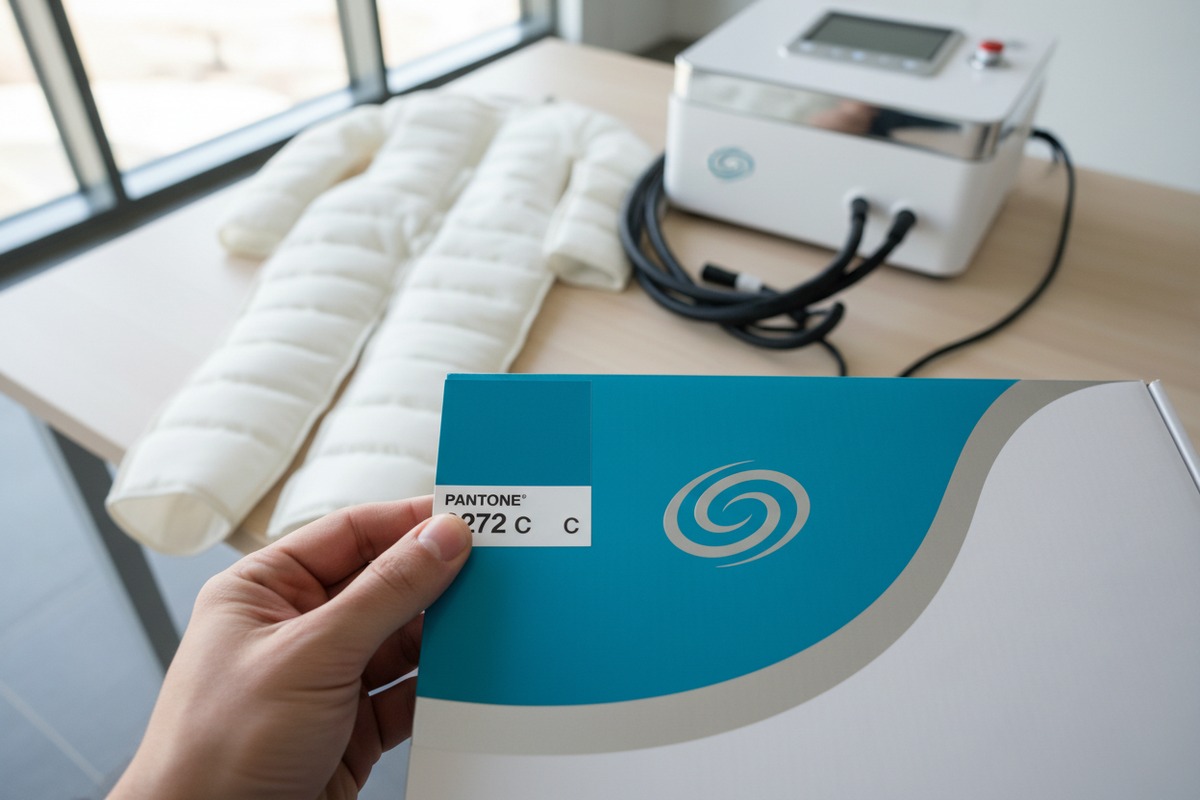
Your dieline file must include CMYK color values for all artwork, Pantone PMS codes for brand-critical colors, 300 DPI resolution for images, 3mm bleed areas, separate layers for artwork and dieline marks, and embedded fonts. Provide a physical Pantone swatch if possible to eliminate color guesswork.
Choose the Right Color System
CMYK stands for Cyan, Magenta, Yellow, and Black (Key) and is used for printing processes where four separate plates apply specific amounts of ink to create colors. This is standard for full-color printing.
For exact brand colors, use Pantone 8. Pantone colors provide precise color matching, ensuring that the final print looks exactly as intended. They are pre-mixed and identified by a unique number, eliminating color separation issues and maintaining color consistency across different materials.
Many brands combine both systems. For example, brands want their logo to appear more inviting. For this, Pantone is best for ensuring consistency in printing. Printing the whole packaging with Pantone often seems expensive to them. Thus, they prefer other design elements to be printed with CMYK.
Set Proper Bleed and Safe Zones
All artwork or graphics that extend beyond the dieline should be extended at least 0.25" or 0.64cm from the edge of the dieline. This bleed area ensures no white edges appear after cutting.
Keep text and logos inside the safe zone—typically 3-5mm from fold and cut lines. In packaging and print, a dieline is a design blueprint that outlines the exact layout of the packaging. It's a guide for designers and manufacturers to ensure all visual elements such as cut lines, fold lines, bleed lines and safe zone are marked on its flattened form before production. By looking at a dieline you can see all sides of the box through its flat construction.
Layer Structure in Design Files
Your artwork should be on a separate layer than the dieline template layer. This separation makes production easier.
Typical layer organization:
- Layer 1: Dieline marks (cut, fold, perforation lines)
- Layer 2: Artwork for outside print
- Layer 3: Artwork for inside print (if applicable)
- Layer 4: Text and regulatory information
Technical Specifications Checklist
| Specification | Required Value | Common Error |
|---|---|---|
| Color Mode | CMYK | Using RGB |
| Image Resolution | 300 DPI minimum | Using 72 DPI web images |
| Bleed Area | 3mm (0.125") | No bleed added |
| Safe Zone | 3-5mm from edges | Text too close to fold lines |
| File Format | AI, PDF (vector) | Raster JPG/PNG files |
| Fonts | Outlined/Embedded | Missing font files |
| Color Codes | Pantone + CMYK values | Only hex codes provided |
Request a Physical Color Swatch
We highly recommend ordering an ink swatch before placing your entire order to ensure you're completely satisfied with the final print. Colors can look different on various screens and devices, so viewing a physical swatch helps you see how the ink will appear on your specific material. This step allows you to confirm the exact color match, finish, and overall look before we move forward with production.
How can I confirm the packaging material is durable enough for international door-to-door shipping?
When we ship pressotherapy machines from Guangzhou to the United States via sea freight, the journey takes 30-40 days. Boxes endure humidity in shipping containers, rough handling at ports, and multiple loading cycles. Standard single-wall cardboard simply cannot handle this punishment.
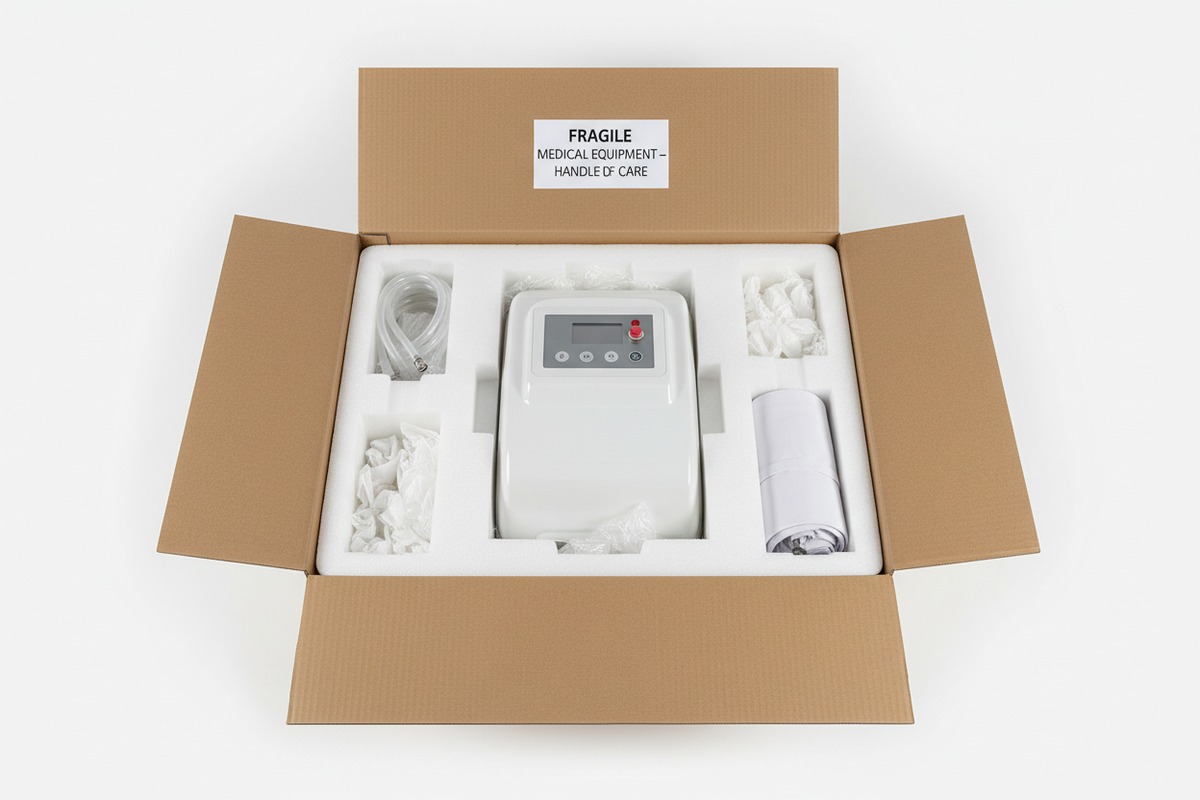
To confirm packaging durability for international shipping, request material specifications including paper weight, flute type, and Edge Crush Test (ECT) ratings. For heavy items like pressotherapy machines, use double-wall corrugated cardboard with ECT ratings above 44. Add internal foam cushioning and moisture-resistant coatings.
Understand Corrugated Board Options
Double- and triple-wall corrugated boxes provide superior stacking strength and crush resistance, which is critical for palletized freight or heavy fragile goods. Be sure to look for boxes rated with a high Edge Crush Test (ECT) score or Burst Strength for maximum durability.
For a 16kg pressotherapy system, we always recommend double-wall corrugated board. Single-wall is acceptable only for lightweight accessories shipped via air freight.
Address Moisture Concerns
Moisture is a constant concern because condensation may develop in the hold of a ship even if it is equipped with air conditioning and a dehumidifier. Another problem is that the cargo may also be unloaded or loaded in rain or snow. Also, the foreign port may not have covered storage facilities.
Solutions include:
- Moisture-resistant coatings on outer box
- Silica gel packets inside
- Polyethylene bag wrapping for the machine
- Desiccant strips on inner foam
Consider Handling Hazards
Besides the normal handling encountered in domestic transportation, a break-bulk shipment transported by ocean freight may be loaded aboard vessels in a net, by sling, conveyor, or chute that puts an added strain on the package. During the shipment, goods may be stacked on top of each other or come into hard contact with other goods. Overseas handling facilities may be less sophisticated than in the United States.
This reality means your packaging must withstand significant compression and impact forces.
Material Specification Comparison
| Material Type | Weight Capacity | Best Use Case | Moisture Resistance |
|---|---|---|---|
| Single-Wall Corrugated | Up to 8kg | Lightweight accessories | Low |
| Double-Wall Corrugated | 8-25kg | Standard pressotherapy machines | Medium |
| Triple-Wall Corrugated | 25kg+ | Heavy industrial units | Medium |
| Honeycomb Board | Variable | Custom protective solutions | High |
| Wood Crate | 50kg+ | Oversized or sensitive equipment | Low (treat first) |
Test Under Real Conditions
Requesting sample packaging allows you to test the materials under real-life conditions. This is especially important if you have specific requirements for your packaging, such as durability, sustainability, or specific dimensions. When testing new packaging materials, you want to use them with your products as if they were on the store shelves. This way, you can test their durability, visual appeal, and label or carton your actual products before you order a large amount.
Our quality team drops packaged samples from specific heights, compresses them with measured weight, and exposes them to humidity chambers. This testing happens before we approve any new packaging design.
What is the most efficient way to review a physical packaging sample before mass production begins?
I remember a situation where we approved a digital mockup that looked perfect on screen. Then the physical sample arrived. The purple compression suit image appeared muddy. The fold lines were off-center. The material felt flimsy. Digital proofs cannot catch everything. Physical samples are essential.
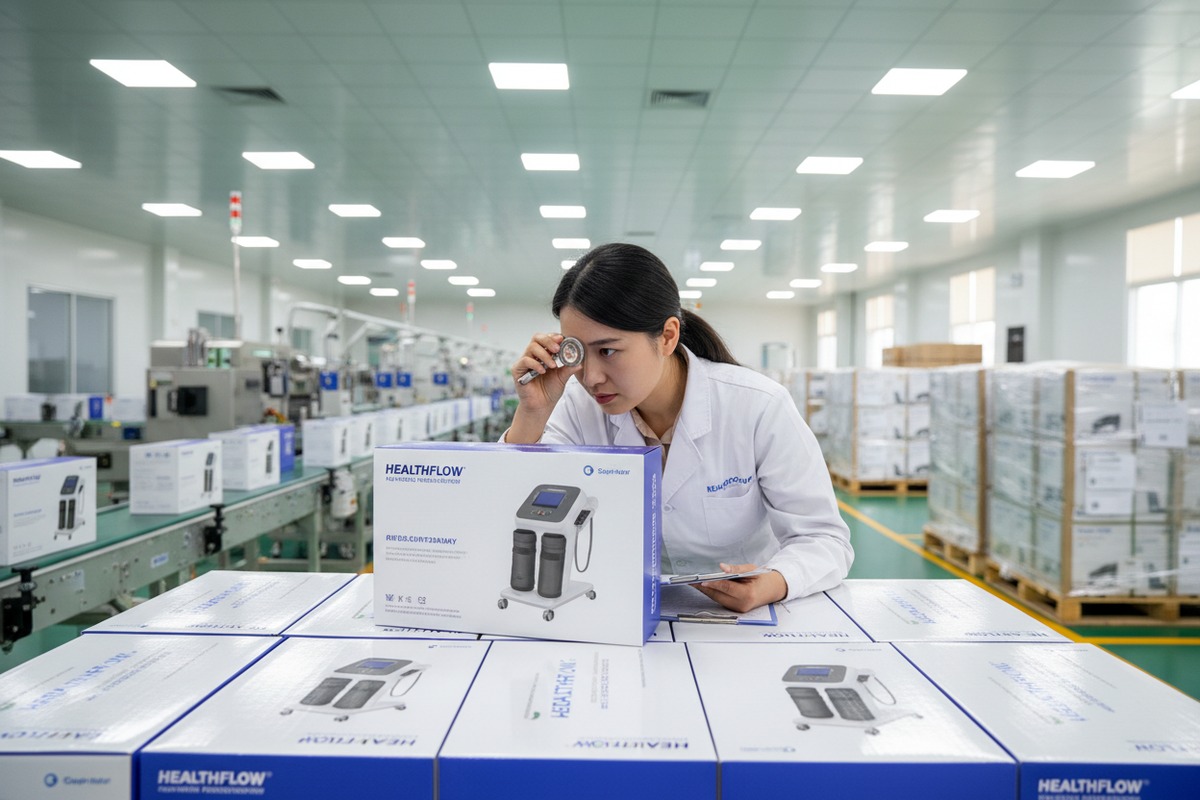
The most efficient sample review process follows three stages: first, request an unprinted structural sample to verify fit and durability. Second, order a digitally printed sample to check artwork placement and color approximation. Third, request a production-grade pre-production sample for final approval. Evaluate each sample against your original specifications checklist.
Understand Sample Types
The packaging sample refers to a prototype or model of the final packaging used for evaluation before mass production. Unprinted samples test structural design without graphics while printing models have branded images and colors. Preproduction samples represent the almost final version of the packaging which confirms that all specifications meet the standards before production.
Each type serves a specific purpose in your approval workflow.
Stage 1: Structural Validation
Unless you send the product to your supplier for exact measurements, determining the exact dimensions for your box can be a bit tricky, especially for uniquely shaped products. Getting a plain sample would be an excellent option to verify the structural design and make sure the packaging is tailored to fit your product securely. Making sure your packaging is a good fit for your product is crucial as it diminishes any risk of damage during the shipping and distribution stages.
For this stage:
- Place your actual pressotherapy machine inside
- Check if foam inserts align correctly
- Test closure mechanisms
- Verify stacking strength by placing weight on top
- Confirm all accessories fit in designated compartments
Stage 2: Print Quality Check
However, if you're looking to offset print your final packaging design, it is recommended to request a production grade sample to get the most accurate representation of your final design. This way you're able to evaluate the printing quality and color output more clearly.
Digital samples print faster and cost less. They work well for checking:
- Artwork alignment
- Text readability
- Logo positioning
- Overall visual impression
However, colors on digital samples may differ from final offset-printed results.
Stage 3: Pre-Production Approval
A missed error in color, dimensions, or functionality can lead to hundreds of incorrect units, wasted budget, and brand inconsistency. A clear and structured PPS (Pre-Production Sample 10) review process lets you spot and fix errors before mass production—protecting your quality, timeline, and reputation.
Think of the PPS as your final opportunity to inspect and adjust before committing to mass production.
Sample Review Checklist
| Review Category | What to Check | Pass/Fail Criteria |
|---|---|---|
| Dimensions | Internal box size vs. product fit | Product fits with 5mm+ clearance on all sides |
| Material Quality | Board weight, surface texture | Matches specified ECT rating |
| Print Colors | Compare to Pantone swatch | Within acceptable Delta E range |
| Artwork Alignment | Logo position, text placement | All elements inside safe zone |
| Fold Lines | Crisp folds, no cracking | Clean folds without paper damage |
| Closure Function | Tuck flaps, glue areas | Secure closure without gaps |
| Finish Quality | Lamination, coating, varnish | Even application, no bubbles |
Communicate Feedback Effectively
If needed, create a revision request with annotated photos and notes. Tip: Don't skip a second PPS if major revisions were made.
When you find issues:
- Take clear photos of the problem areas
- Mark issues directly on the sample with a pen
- Write specific correction instructions
- Request confirmation that supplier understands changes
- Set a deadline for revised sample delivery
Timeline Considerations
When requesting sample packaging, ask your supplier how long it will take to receive your samples. Setting a deadline also allows you to plan ahead and make any necessary changes or adjustments before placing a large order. This can save you from potential delays or issues that could affect your production timeline.
Typical sample timelines from our factory:
- Unprinted structural sample: 3-5 business days
- Digital printed sample: 5-7 business days
- Production-grade sample: 7-10 business days
- Shipping to USA: 3-5 days (express courier)
Build sample review time into your project schedule. Rushing this stage leads to costly production errors.
Conclusion
Getting your pressotherapy machine packaging right requires attention to measurements, technical specs, material durability, and sample verification. At our factory, we follow this same process for every OEM project. Take time to communicate clearly with your supplier at each stage. The effort you invest upfront prevents costly mistakes later.
Footnotes
1. Provides resources and examples of 2D vector templates for packaging design. ↩︎
2. Explains the differences and applications of CMYK and Pantone color systems in printing. ↩︎
3. Outlines key principles and importance of effective structural packaging design for brands. ↩︎
4. Explains what Edge Crush Test (ECT) ratings mean for corrugated packaging strength. ↩︎
5. Details the properties, benefits, and applications of closed-cell polyethylene foam for cushioning. ↩︎
6. Official product page for Esko ArtiosCAD, an industry-standard structural packaging design software. ↩︎
7. Official product page for Adobe Illustrator, a leading vector design software. ↩︎
8. Official website for Pantone, the global authority on color systems and matching. ↩︎
9. Describes the construction and benefits of double-wall corrugated cardboard for heavy-duty shipping. ↩︎
10. Defines and explains the critical role of pre-production samples in quality assurance. ↩︎

 English
 Español de México
 Deutsch
 Français
 العربية
 Русский